Social Authentication with Expo and Supabase
Sign In with Apple or Google login? With Supabase social auth providers both are very easy to implement. Try it out now!
The goal of this tutorial will be to create a React Native app and be able to log into the app with several social media providers. The app will support different app flavours/variants/environments so we can set up a development, staging and production version.
Project set up
To start, download the Github repository I’ve made as an example. All the finalised code to build the application is included within the repository. The app makes use of Expo Application Service (EAS). Make sure that, before this tutorial, you have the following:
- Expo.dev account and expo-cli installed
- Basic knowledge about creating an Expo app using EAS
- Apple Developer account
- Google (Developer) account
- Supabase account
While I’d try to keep to boilerplate as easy and small as possible, some implementations I did are opinionated to the way I work. Think about using styled-components for styling, my ESLint rules and Prettier for formatting and sorting the imports.
Installation
This project support building the app in different environments/variants/app flavours. The app will support development, staging and production, but for this tutorial, we will only use development and production. Start with modifying the env.js in the root of your project. Change the BUNDLE_ID, PACKAGE and NAME constants within this file. This will automatically set up the correct deep linking/redirect URLs within your app. In my example, the bundle ID com.expobase is being used. Therefore, after logging in, users will be redirected to com.expobase://{PAGE}/.
1git clone git@github.com:rnnyrk/expo-router-supabase-social-auth.git YOUR_PROJECT_NAME
2cd YOUR_PROJECT_NAME
3npm install
4
To customise the project, you can modify:
src/styles/theme.ts, to change colours within the applicationsrc/assets/images/*.png, the images in this folder are used as app icons and splash screens. The Expo plugin app-icon-badge automatically generates different app icons based on the environment you are (pre)building (seeapp.config.ts).
Environments
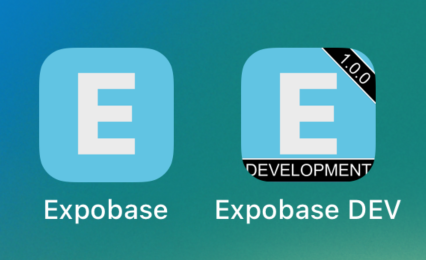
Because we're creating both development and production apps, all the steps of this tutorial have to be done twice. So creating two Google apps in the development console and creating all identifiers and keys for Apple twice. You should also create two projects in Supabase. I've called one "Expobase" and the other "Expobase DEV". Within the Apple and Google consoles, I follow the same notation. With a DEV suffix (or ACC for staging) and just the name for production.
Create a project within Supabase and under “Project Settings” find your “Reference ID” (Supabase ID).
Within your editor, change the .env.example file to .env.development and create another .env.production. Fill in the required properties from your “Project Settings” page. The EXPO_PUBLIC_SUPABASE_URL_DEV is within “Project Settings > API > Project API keys” and can be found as anon key. The EAS_PROJECT_ID will be created the first time you deploy this project to your Expo account via the expo-cli.
1EXPO_PUBLIC_SUPABASE_URL_DEV=https://{SUPABASE_ID}.supabase.co
2EXPO_PUBLIC_SUPABASE_PUBLIC_KEY_DEV={SUPABASE_ANON_KEY}
3EAS_PROJECT_ID=
4
In .env.production the _DEV suffix is replaced with _PROD. The values within these files are loaded into the project via env.js in the root of your project. Throughout the project you can access env variables with import { Env } from '@env';.
These environment variables should also be included in your Expo/EAS project secrets page. Without these secrets in your Expo account, building the final application will fail.

You can now run the project. For a development build, run (you can also replace ios with android):
1npm run prebuild
2npm run ios
3
For every environment, there are various NPM build commands.
- Development
npm run prebuildnpm run ios/npm run androidnpm run build:development:iosnpm run build:development:android
- Production
npm run prebuild:productionnpm run ios:production/npm run android:productionnpm run build:production:iosnpm run build:production:android
It's possible to run both the development build as well as the production build on the same device. Both will be installed with separate names and app icons. Don't forget to run npm run prebuild or npm run prebuild:production before building the app for a specific environment. Prebuilding will set the correct config for that environment. Read more about Prebuilding in the Expo docs.
Database
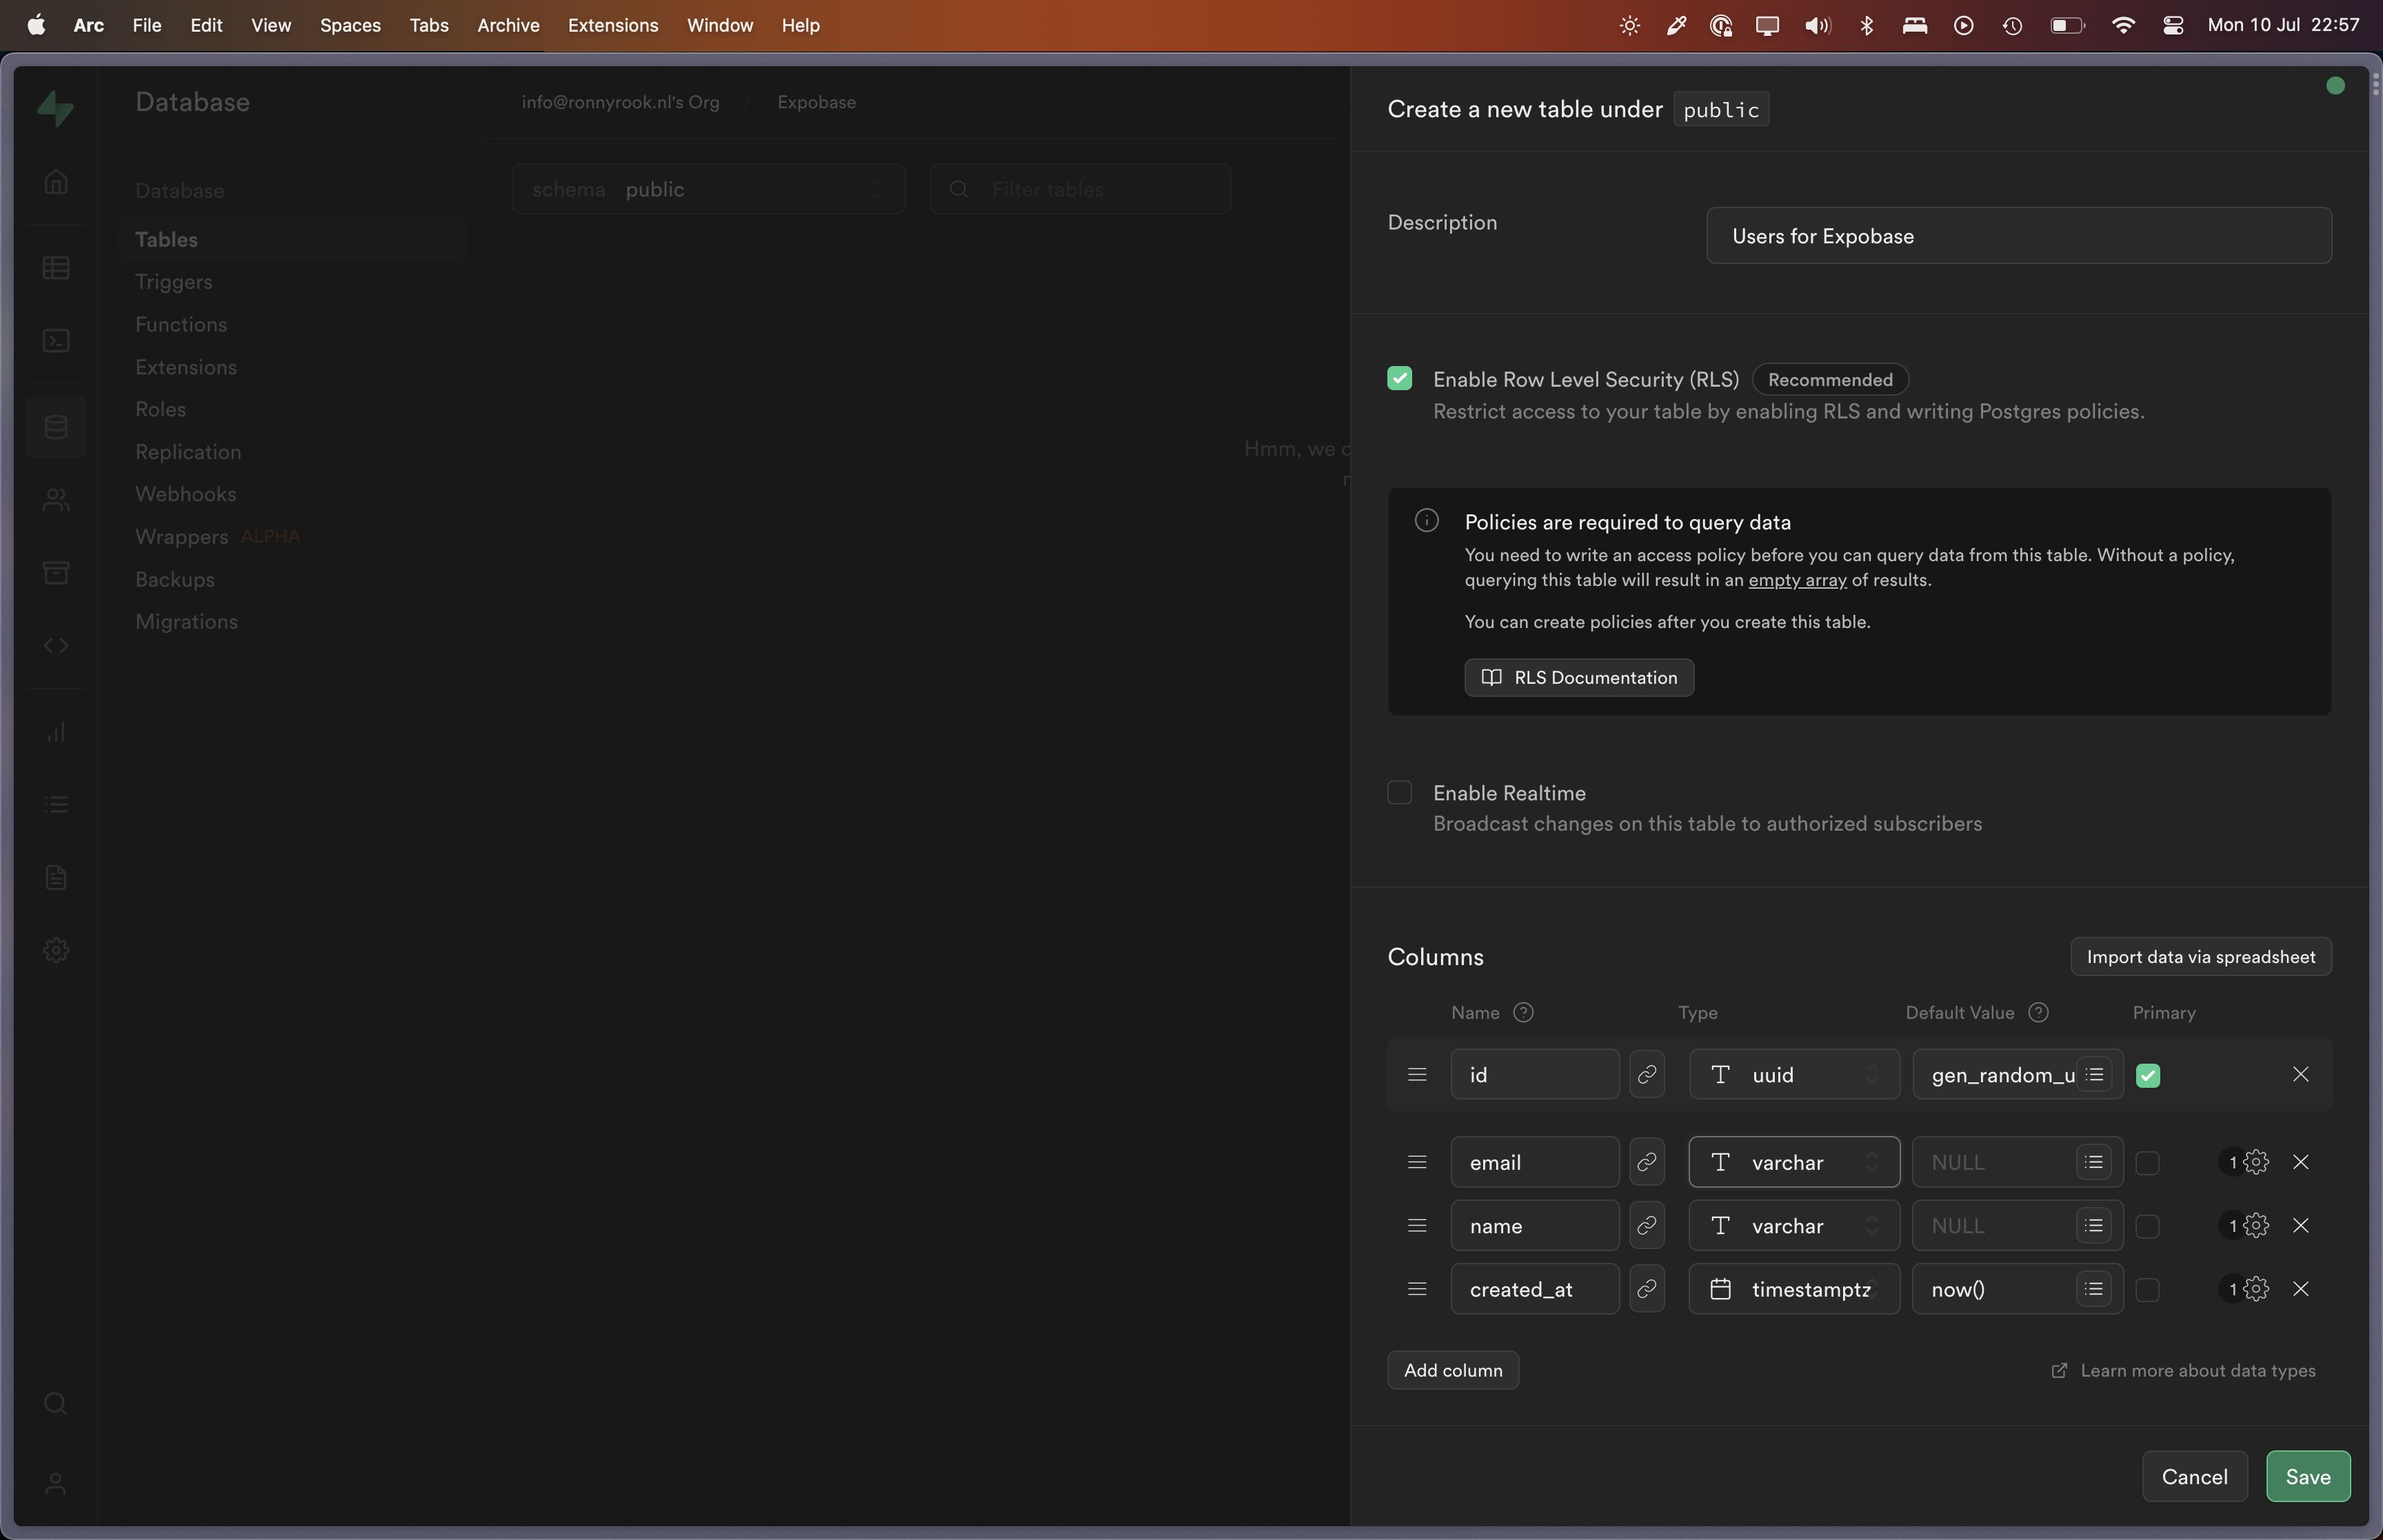
In the main menu go to “Database > Tables” to create a new table called users. Create the fields as shown below. Fill in gen_random_uuid() as the default value for the id field.
Row Level Security
The next step is to set up Row Level Security (RLS) for this table. With RLS we can set CRUD actions to be allowed publicly, or only when users are, for example, authenticated.
Within the Supabase main menu go to the “Table editor > users” and find the “No active RLS policies” in the top right corner.

For now, we only need two RLS policies. We want everyone to be able to sign up and read the user data. When you click “New Policy > Get Started Quickly” you can use a template to set up the read and insert access for all users by simply setting the value to true. For update, use the "Quick Start" template of the policy named "Enable update for users based on email", so the passed JWT token of the logged-in user is matched with the email column in this table to find the rows a user is allowed to update.
The first step is done! Now let’s move on to setting up authentication with Google.
Google Authentication
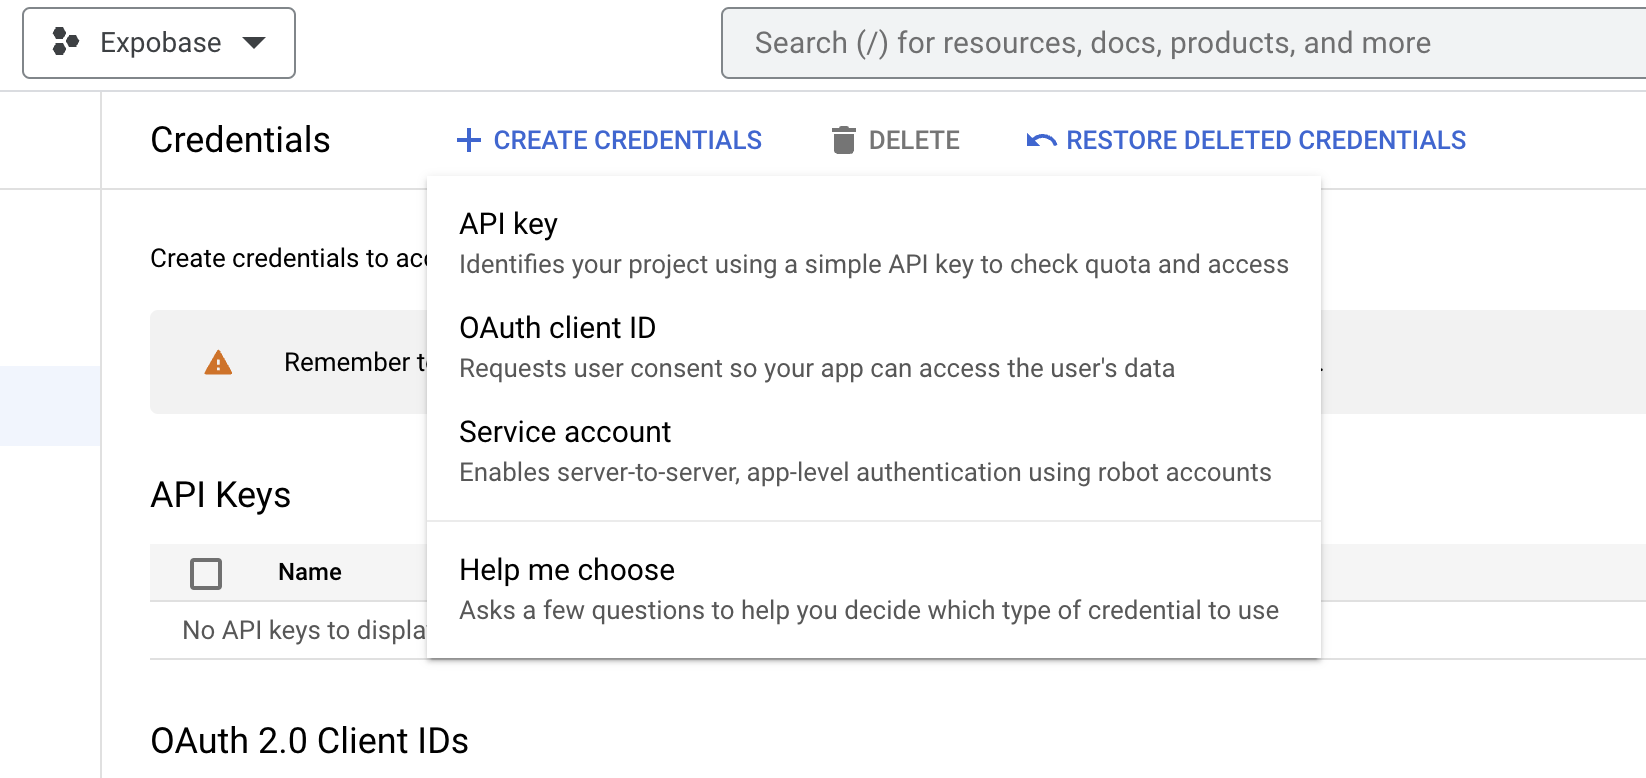
Visit your Google Cloud Developer Console and create a new project. After creating the project, you might be prompted to set up the OAuth Consent screen first. Just follow the steps accordingly. After, choose “Create credentials” and create a new “OAuth Client ID”.
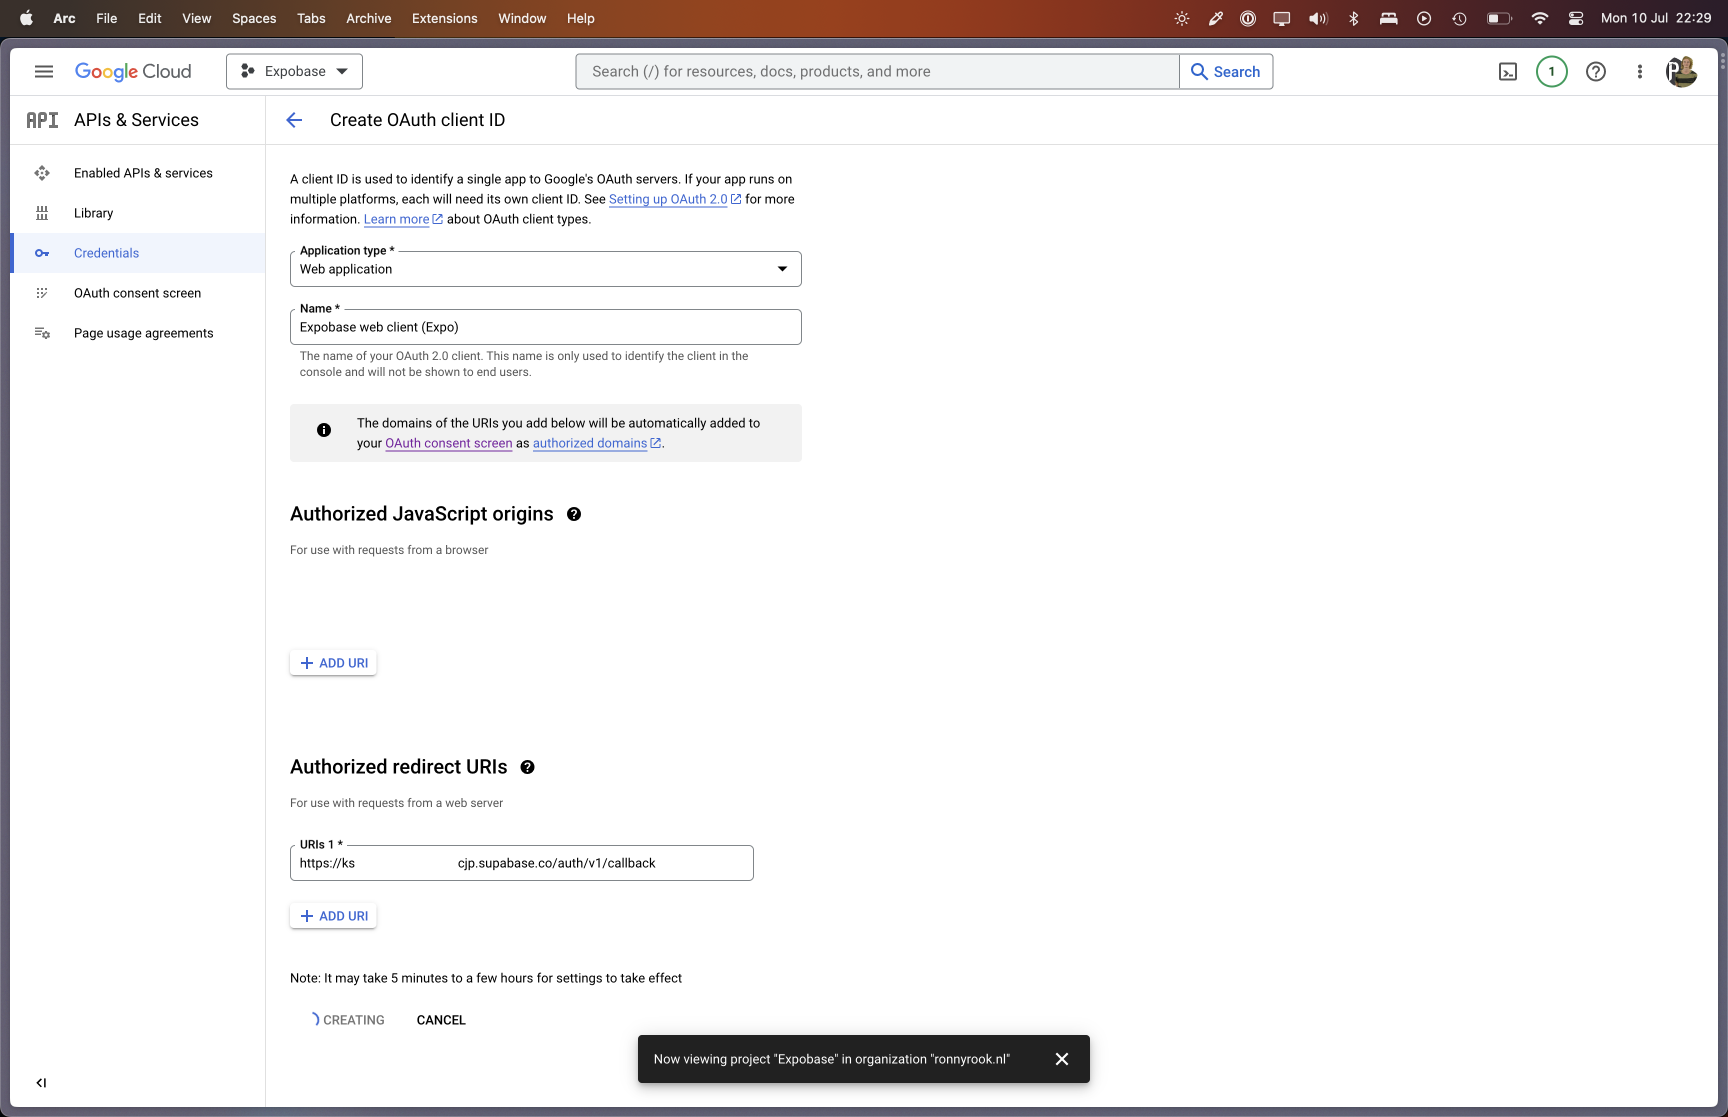
Use “Web application” as the application type. Now get your “Reference ID” from your “Project Settings” page in Supabase, as mentioned in the first step of this tutorial and use it as an “Authorized redirect URI“: https://{SUPABASE_ID}.supabase.co/auth/v1/callback
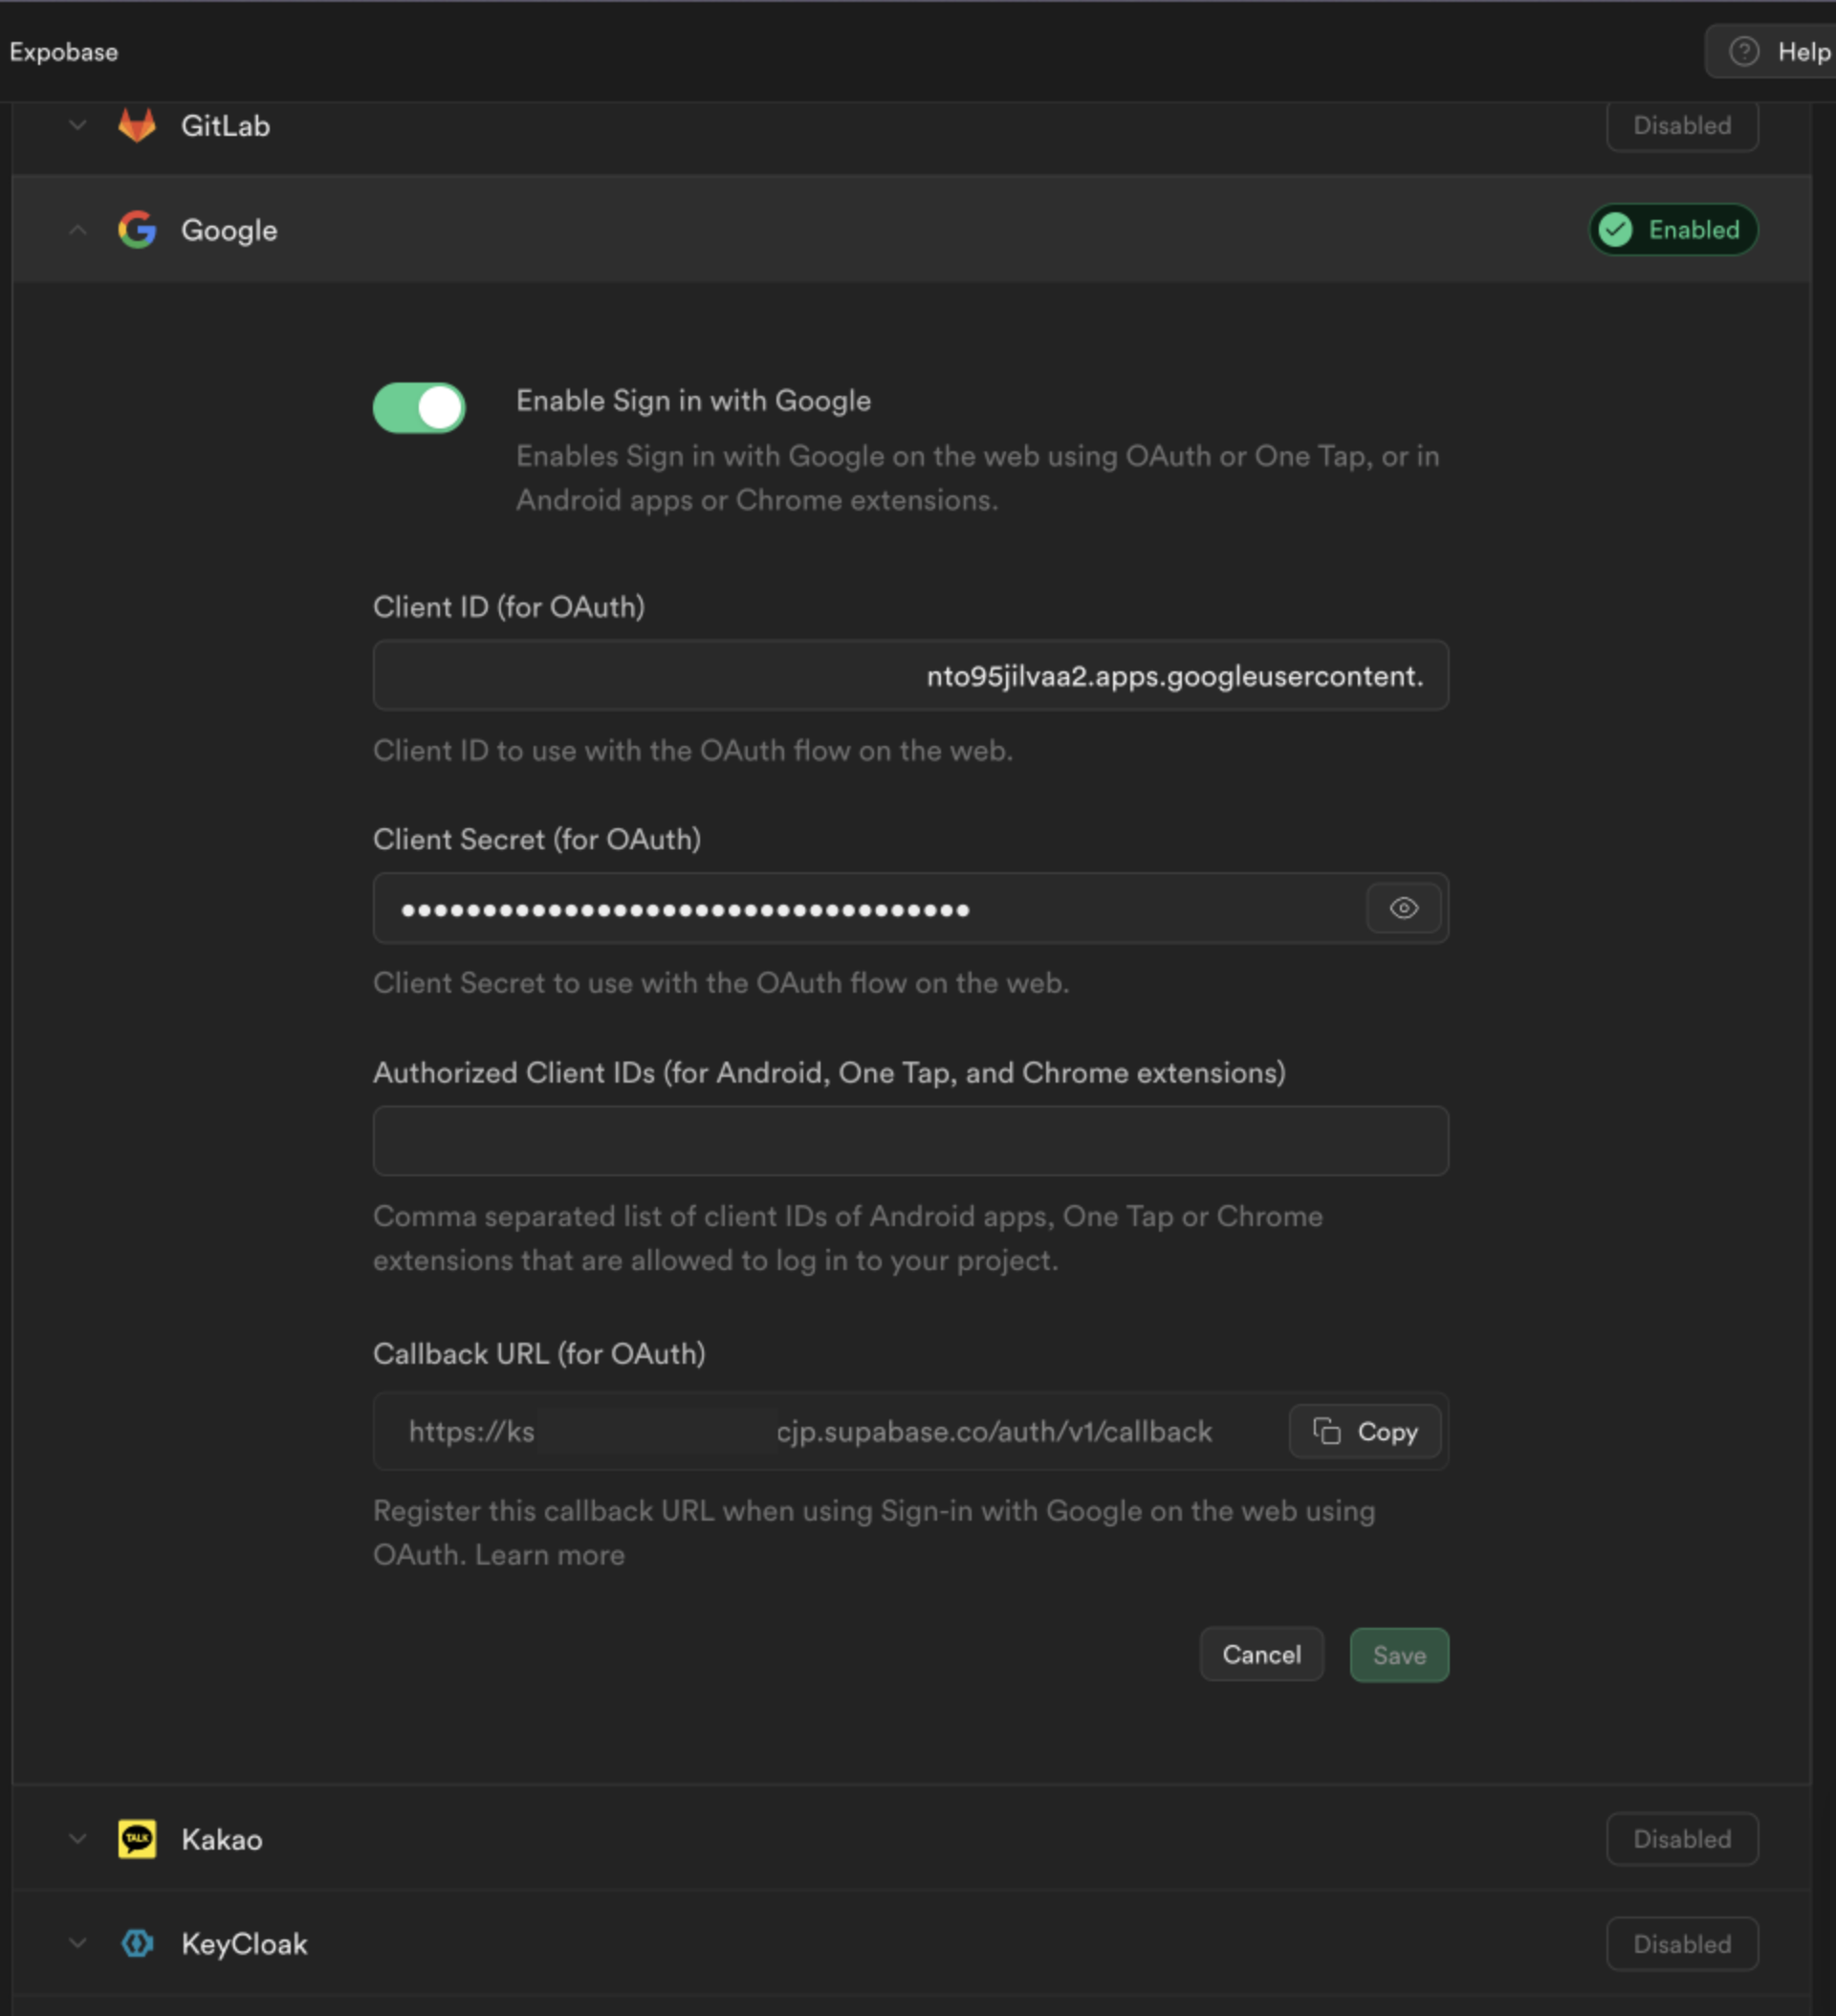
On the following screen, after creating the project, you will find your Client ID and Client Secret on the right side. These values need to be filled in your Supabase dashboard. In the Supabase main menu go to “Authentication > Providers > Google”. To start with, disable the email provider and enable the Google provider. Fill in your Client ID and Client Secret from the Google developer console.
In Supabase, find the left submenu within “Authentication” and navigate to “URL Configuration”. Under “Redirect URL” fill in your scheme and the page you want to redirect to, from your Expo app (see app.json). In my case, this is com.expobase://home/, since the scheme name is com.expobase and the page I want to redirect to, after authenticating, is home/.

Usage within your app
The Github repository includes some basics to provide a working login.
First of all, you shouldn’t forget to adjust the redirect URLs within the following two files:
src/utils/SupabaseContext.tsxtheredirectTourls/app/index.tsxthe second param of theopenAuthSessionAsyncfunctions
The /app/index.tsx is the login screen of the application and the first screen users will land on. There are two buttons, one for Google login and one for Apple login.
Both initiate an OAuth flow using supabase.auth.signInWithOAuth() and opening a web browser, redirecting you to the login, using expo-web-browser.
After these steps, you should be able to successfully login into your app using Google Authentication. Once you've completed the login, you should see a new user in both the users table, as well as in the overview on the “Authentication” page of Supabase.
Let’s move on to authenticating with Apple!
Apple Authentication
Starting with the Apple authentication, you should be having a paid Apple Developer Account, and should be able to access this Certificates, Identifiers & Profiles page.
First, find your Apple Team ID in the top right corner of the developer console.

Secondly, register your email and domain for Sign in with Apple for Email Communication which can be found in the Services section of the Apple Developer Console.
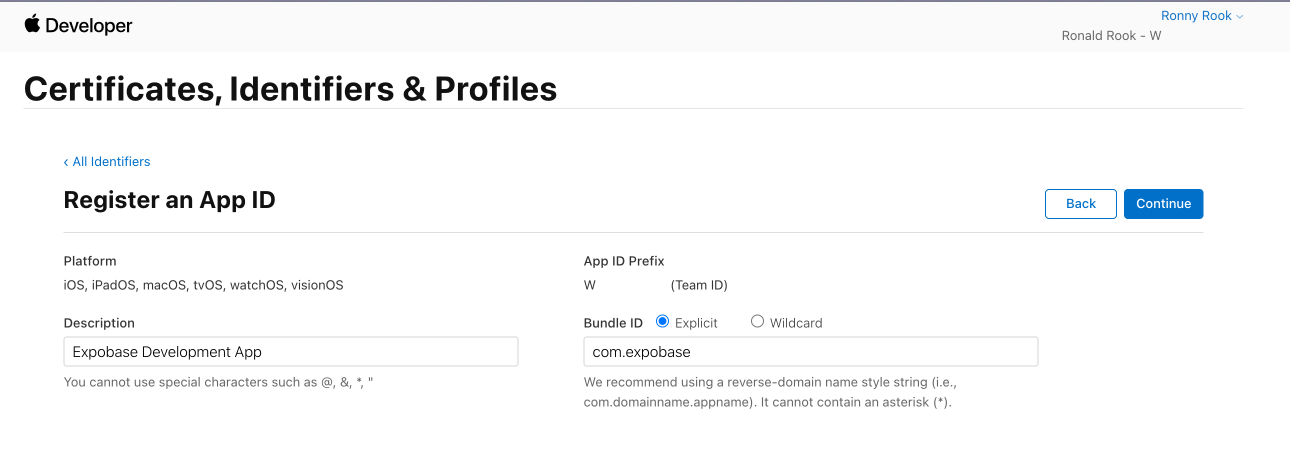
After that, go to the Identifiers page and create a new identifier for your application, choose to register an App ID. Make sure you configure Sign In with Apple Capabilities list.
At this time Supabase Auth does not support Server-to-Server notification endpoints, so you should leave that setting blank when configuring the capability.
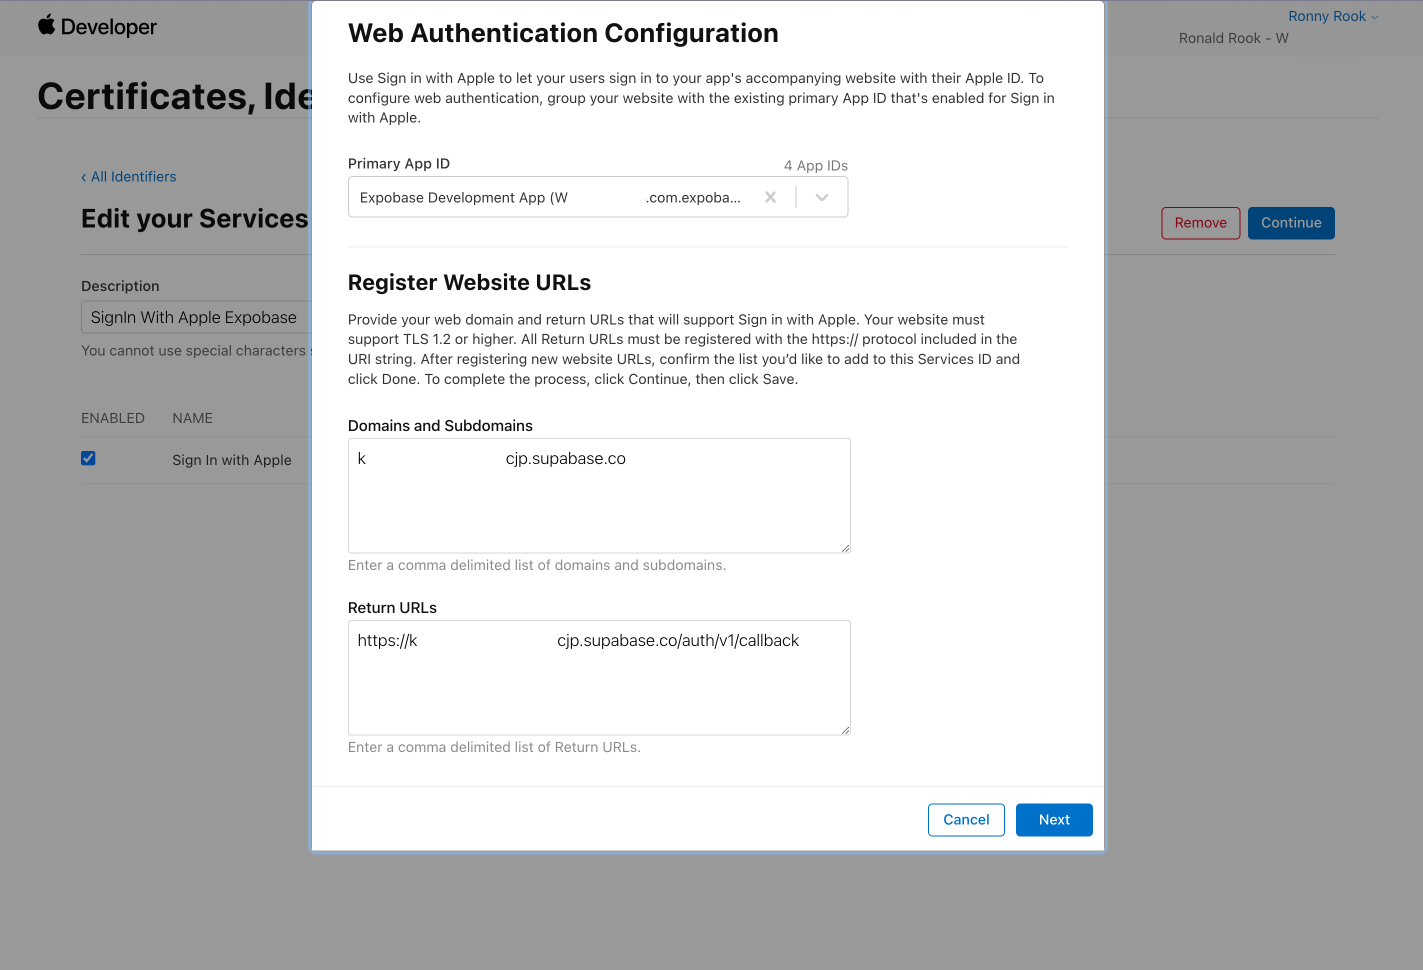
Setting up Sign in with Apple requires some more configuration. Go to the Identifiers page and create a new identifier again. Choose Service ID (second option) now instead of App ID. Create the Service ID (I usually pick com.expobase.swa as an identifier, where swa stands for SignIn with Apple). After creating the Service ID, directly edit it, check the Sign In with Apple checkbox and configure the URLs. This is usually <project-id>.supabase.co while the redirect URL is https://<project-id>.supabase.co/auth/v1/callback.
After that, go to the Keys page and create a new key. I called my key ExpobaseSWA, check the Sign In with Apple checkbox and configure it with your created App ID. After registering it, download the key (save it somewhere securely, since it can only be downloaded once). This page in the Supabase documentation provides - halfway through the page - a tool where you can generate a secret key with your just downloaded .p8 file, your Account ID (Team ID), your Service ID and your Key ID (should be in the .p8 filename AuthKey_{KEY_ID}.p8 or can be found on the key detail page in the Apple dashboard).
Insert this secret key in your Supabase dashboard under “Authentication > Providers > Apple” together with your other app credentials.

You should now be able to have a successful login using Sign In with Apple.
Conclusion
Setting up an Expo application with both Google and Apple logins requires a lot of configuration and therefore time. Hopefully, with this tutorial, I've taken the hard parts out of your hands and made the process of starting a basic app with social authentication as smooth as possible. You can also contact me via Twitter if you have any questions.
Troubleshooting
Most issues I've had were regarding building the Android application. If you run into similar issues, I recommend looking into this Github issue where a summed a lot of errors and possible solutions.